Create Cardboard Apps in Unity
In this tutorial, we will setup Unity to develop apps for Google Cardboard and know some best practices.
This tutorial assumes that you already have some experience in Unity and that you have Android SDK installed.
Overview
The Unity version used in this tutorial is 2017.3.1f1 and the SDK version is v1.130.1. We will first download the Google cardboard SDK from Github, then set up the Project Settings. Finally, we will mention some stuff to take care of in the scene and how to interact with UI elements and 3D objects.
 End result
Downloading the SDK
An SDK stands for Software Development Kit.
“SDK is typically a set of software development tools that allow the creation of applications for a certain software package” -Wikipedia
To download the SDK:
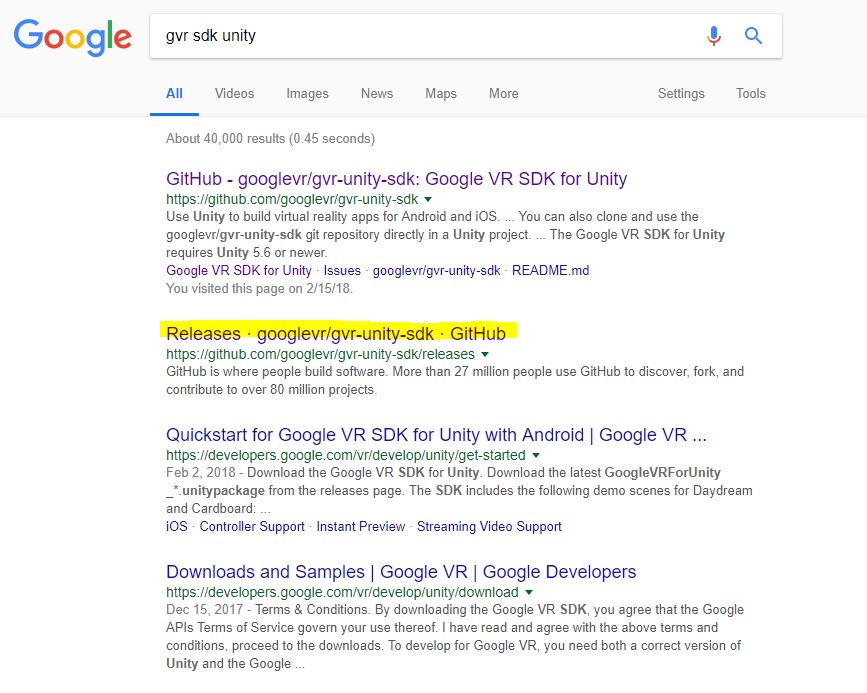
- Go to google and search for GVR SDK unity which is short for Google Virtual Reality Software Development Kit unity.
- Open the link that says Releases
Or visit directly this link Google VR SDK Releases.
 Google Search
- Download the .unitypackage from the latest release or whatever the release you like. The current version when I made this tutorial was v1.130.1. It might be different but the concept is the same to download the .unitypackage.
 Latest Release and UnityPackage
Project Settings
After installing the SDK, it is not automatically imported in all your projects. You need to manually do that for every project you want it in.
Let’s get started
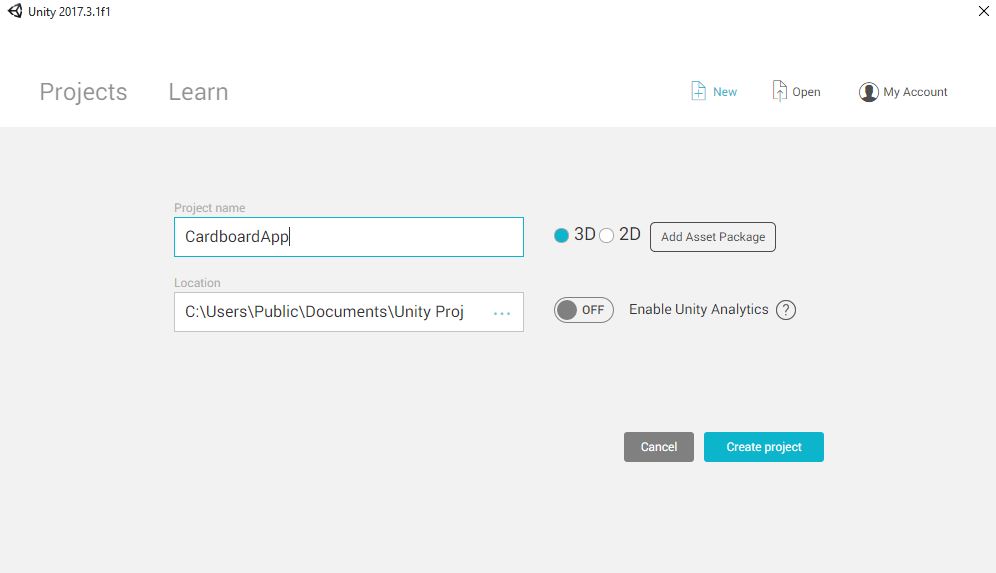
- Create a new Unity project and name it whatever you like, I named mine Cardboard app with Analytics turned off and a 3D project.
 Unity project
Import the Gvr SDK we downloaded. This can be done in multiple ways:
- Double click the .unitypackage file
- Drag and drop the file in the Assets folder
-
From the upper menu, Assets>Import Package>Custom Package.. and browse for the asset you want.
- When asked what to import, click All then click Import and wait for the loading to finish
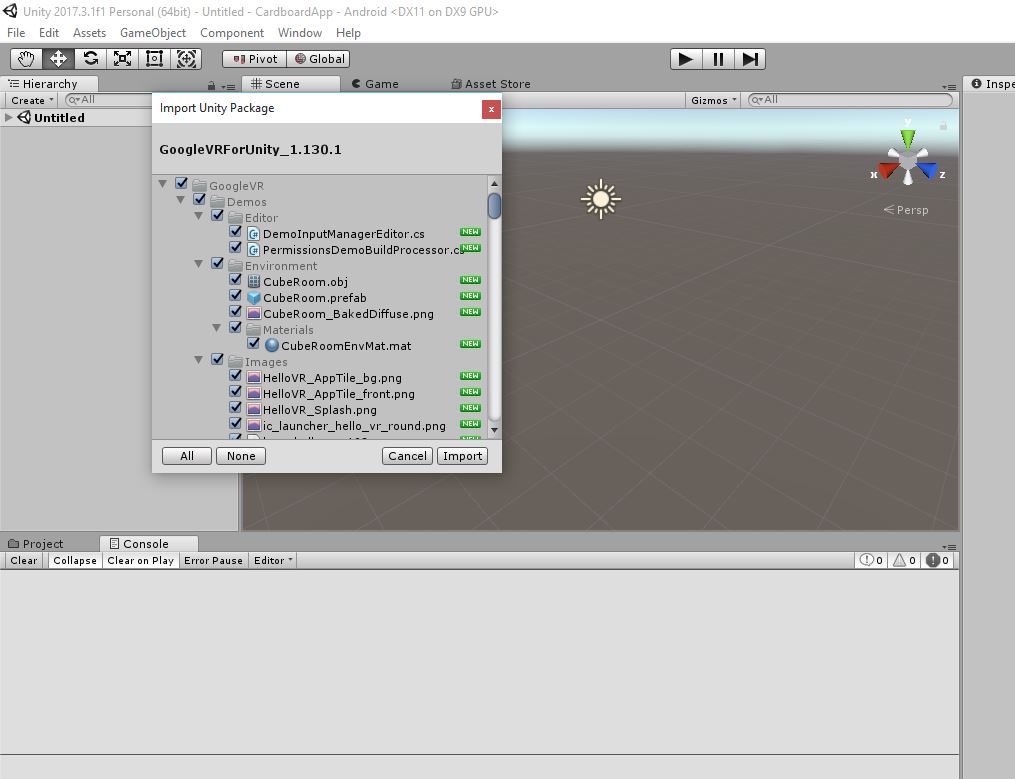 Import
Before going anything further, make sure that you have your Android modules installed when you first installed Unity and that the Android SDK and Java JDK are installed as well.
-
Go to Edit>Preferences and make sure theSDK and JDK are available. NOTE: The Android SDK is different than GvrSDK we downloaded. If you don’t have it installed, press the Download button and follow along. There will be another tutorial in future dedicated for this.
 Preference Settings
 - Now go to the build Settings by pressing Ctrl + Shift + B or by going to File>Build Settings.
- Choose Android and Press the Switch Platform button at the bottom left corner of the window.
 Switch Platform
Now go to the Player Settings. There are 2 ways:
- From the Build settings click on the Player Settings button beside the Switch Button
- From Edit>ProjectSettings>Player
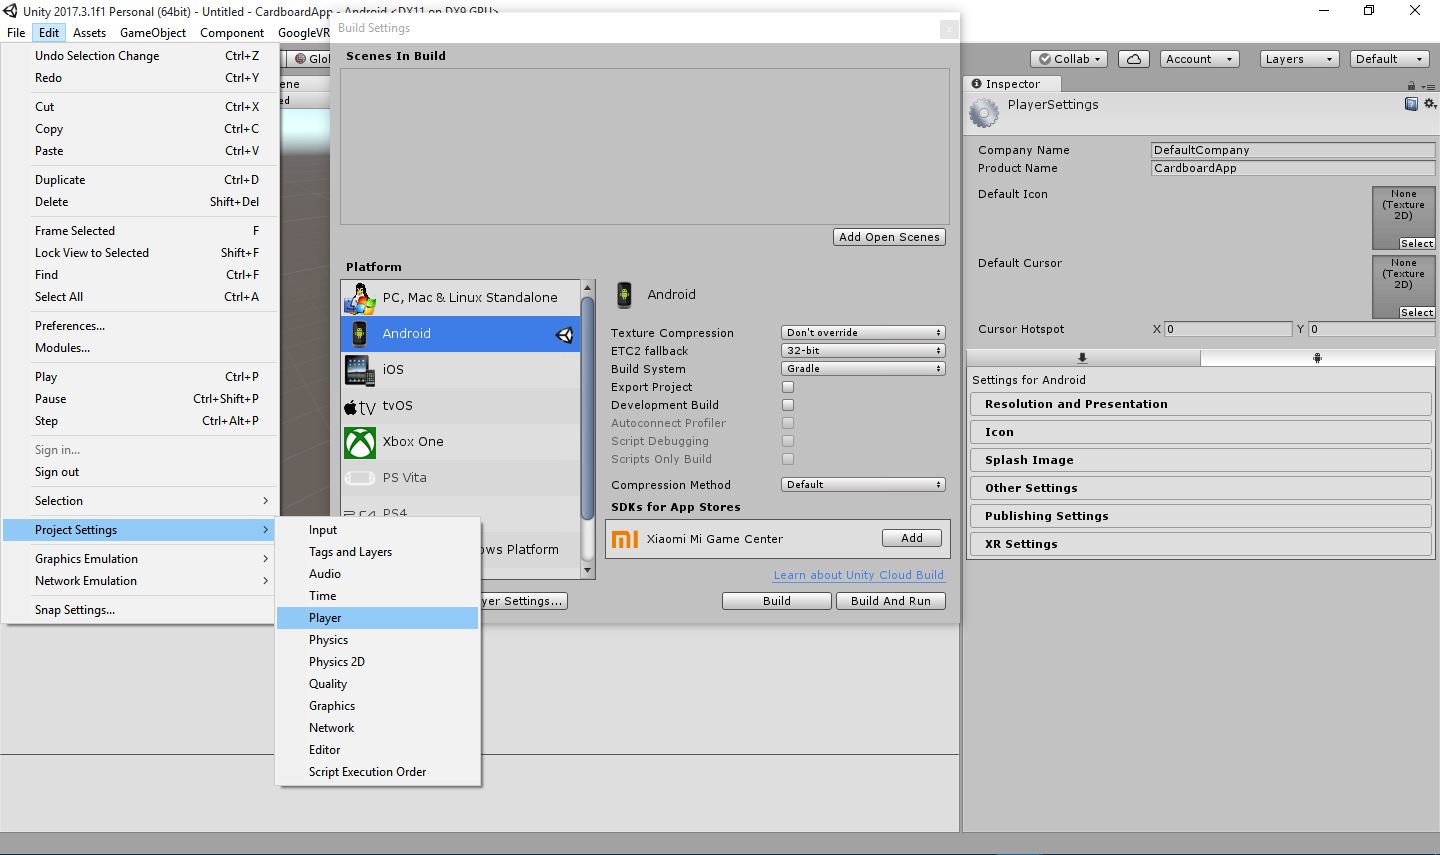 Project Settings
The first thing to modify in the Player Settings is the XR Settings
- Open the XR Settings tab by clicking it
- Enable Virtual Reality Supported
- Add the Cardboard from the drop down
Add Cardboard SDK
- Go to the Others tab
- Change the Package Identifier. Make sure you press Enter key after writing down the name because Unity sometimes doesn’t save changes.
- Make the minimum API level 4.4 or higher
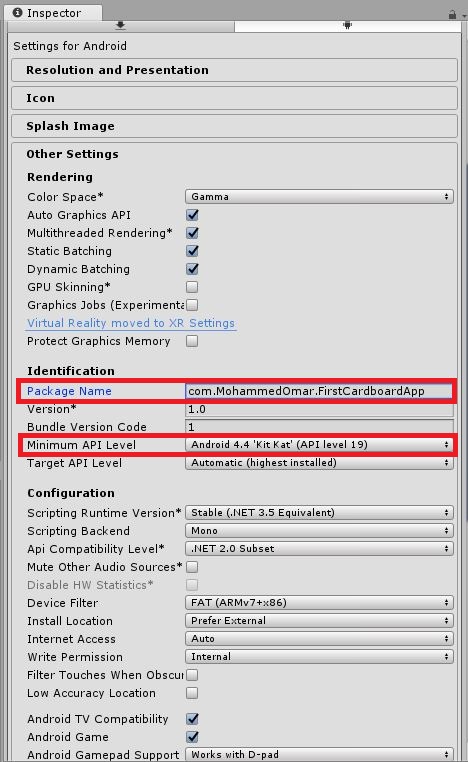
Others Settings
Scene Settings
We are now ready to move on into the scenes, but let’s first organize our folder.
- Create a new folder named _Scenes and save your scene inside it.
- Open Build Settings and click on Add open scene
 Save scene
Let’s add some important prefabs to be able to test in the editor and interact with UI elements. All the important prefabs are found in GoogleVR>Prefabs
- GvrEditorEmulator which allow for the emulation of the Cardboard in the Editor
- Cardboard>GvrReticlePointer is the pointer that enables the interaction with the UI system and 3D objects make sure that it’s a child to the MainCamera and that it’s in zero zero zero with no rotations and a scale of 1.
- Controllers>GvrControllerMain which allow for the cardboard to actually work
- EventSystem>GvrEventSystem. Make sure there is only one event system in the scene. Delete any before adding the GvrEventSystem from the prefabs.
 Prefabs
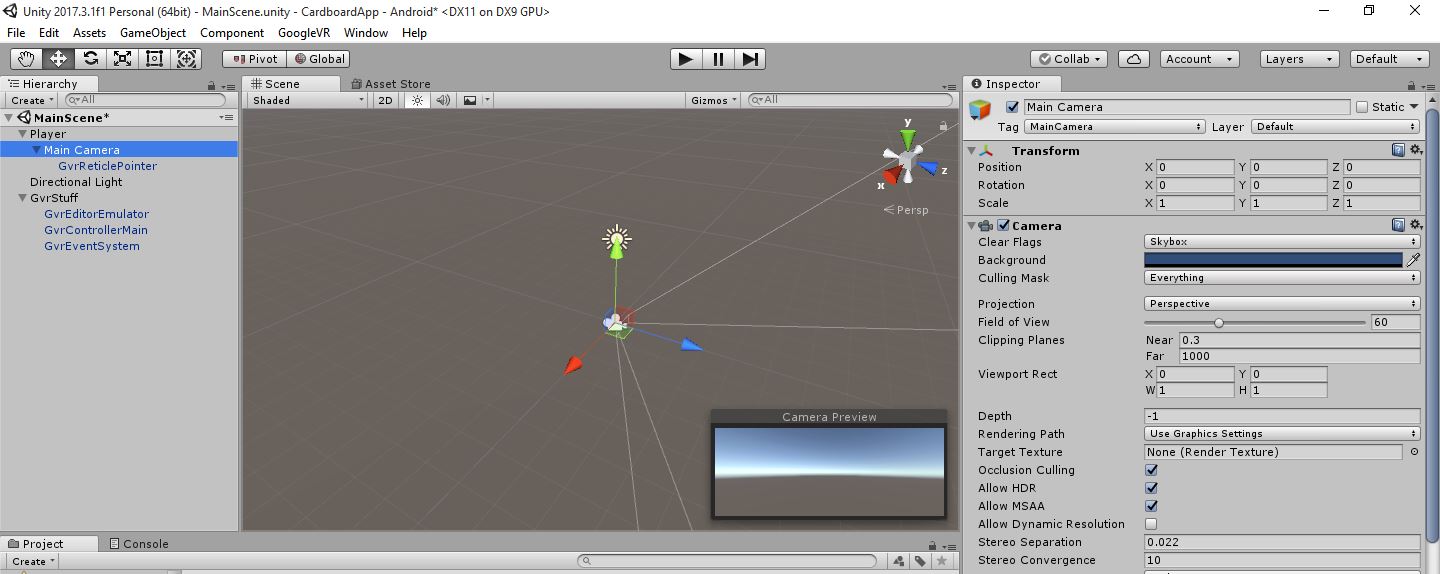
There are few things we need to understand before moving on. Every time we run the scene now, we will find that the Main Camera resets its transforms whatever it’s position is and we can’t change it. What if we want to move around? What the GvrSDK does is that it set’s the Camera’s local position to zero and makes it stay zero. To solve this:
- Create an empty GameObject, name it Player and place it anywhere you like.
- Make the Main Camera a child to it and resets its transform
- Don’t move the Camera anymore and move the Player wherever you like.
To organize stuff for me, I usually create an empty object and name if GvrStuff and throw in it the EventSystem, Emulator and Controller.
Your final setting should look like this:
 Final Setting
Pressing play now, You can rotate around by holding the Alt key and interact using the normal mouse click but we have nothing to interact with which is the next step.
Interacting with UI
Interaction with UI will work like a charm without anything because we already added the GvrEventSystem and GvrReticlePointer, but let’s test it out.
- Create UI>Button
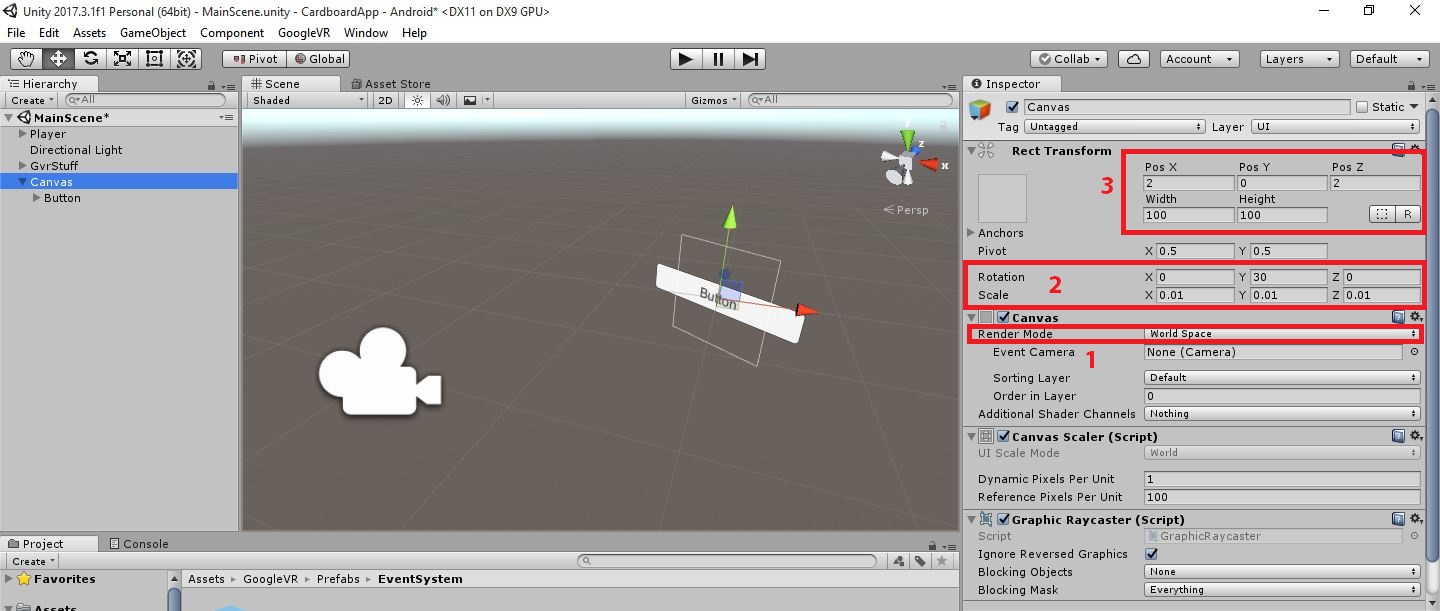
- Set the Canvas’s Render Mode to World Space
- Set the Canvas scale to (0.01, 0.01, 0.01)
- Set the rotation to (0, 30, 0)
- Set Position to (2, 0, 2)
- Set the width to 200 and height to 100
- Set the button position to (0, 0, 0)
You will end up with something like this
 Canvas Setup
- Go to the canvas and remove the Graphics Raycaster component and add the Gvr Pointer Graphics Raycaster
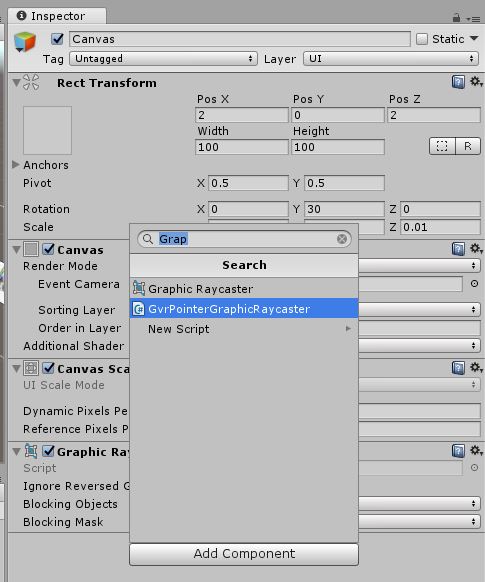 Graphics Raycster
Let’s create a simple cube to test changing its material
- Create a cube and make its position (-1, 0, 3) with no rotation and scale
- Create a material with the Red color for example
- In the OnClick of the button, add an event and drag the Cube
- Choose the MeshRenderer
- Select Material material
- Drag and drop the Red material
 Setup
Setup
Now let’s test it
- Press play button
- Hold Alt key to move around and click to simulate the Trigger button
 Awesome
Interacting with 3D Objects
Let’s try to interact with the Cube Directly without any button, We will change its material using EventTriggers. These are events that triggers when certian action happen like Pointer up and Pointer click. For more info, see the documentatio.
To be able to interact with 3D objects we need the Main Camera to be able to detect that.
-
Go to the Main Camera and add a component called GvrPointerPhysicsRaycaster
 Gvr Physics Raycster
 -
The object you interact with needs to have a Collider and an EventTrigger components.
The cube by default comes with a collider, let’s add an Evenet Trigger
- Add Component button and write Event Trigger
- Press Add New Event and select PointerEnter.
We are not going to go through all these events. What we will test are:
- Pointer Enter: Fires when the pointer is over the 3D object
- Pointer Exit: Fires when the pointer leaves the 3D object
- Pointer Click: Fires when the Pointer clicks on the 3D object
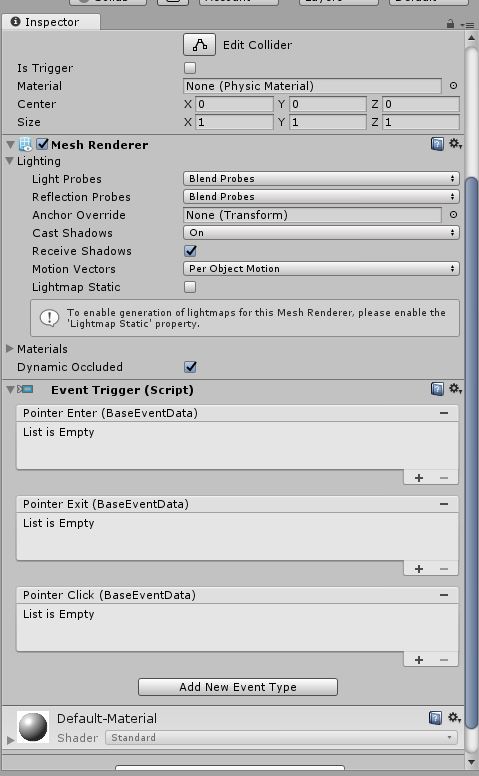
Event Trigger
Just like we did with the button On Click, we will duplicate the material 3 times and add 3 different materials to test it.
 Event Trigger Material
Press play and let’s test it.
 Test
Test
Build the APK
To build and test it on your Android device,
- Go to the Build Setting and click on Build
- Create a new folder named Build and choose a name for your APK
 Build
Build
For your information, the name that will appear when you install the app on your phone won’t be the APK name. It will be the name set in the Player Settings
 APK Name
Summary
We downloaded and added the Gvr SDK to our project, configured the project settings and add the needed prefabs in our scene. We also learned how to interact with the UI and 3D objects in our scene and that’s it’s important to make the Canvas world space and what to add remove and replace for graphics ray casting and physics ray casting to work well.
Final